How to Add Data Inventory
Review What Inventory Needs to be Tracked? to learn more about what should be added in this step.
Steps
Add your Inventory
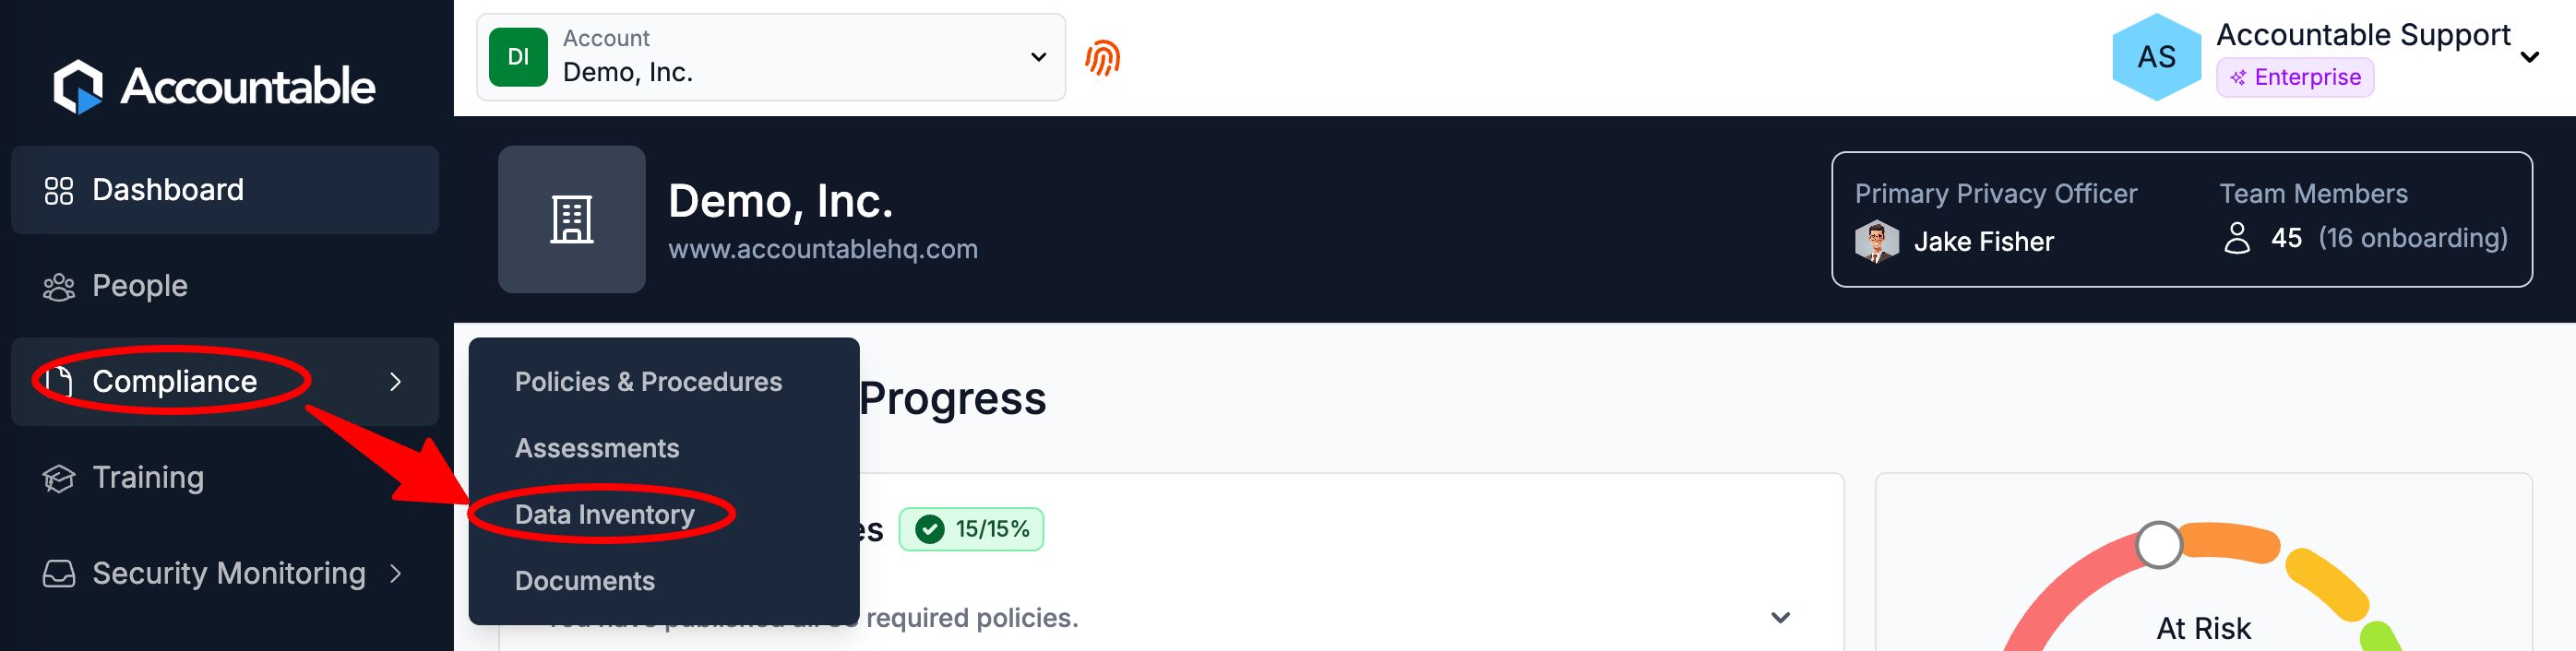
From your Dashboard, hover over the Compliance Tab > Select Data Inventory
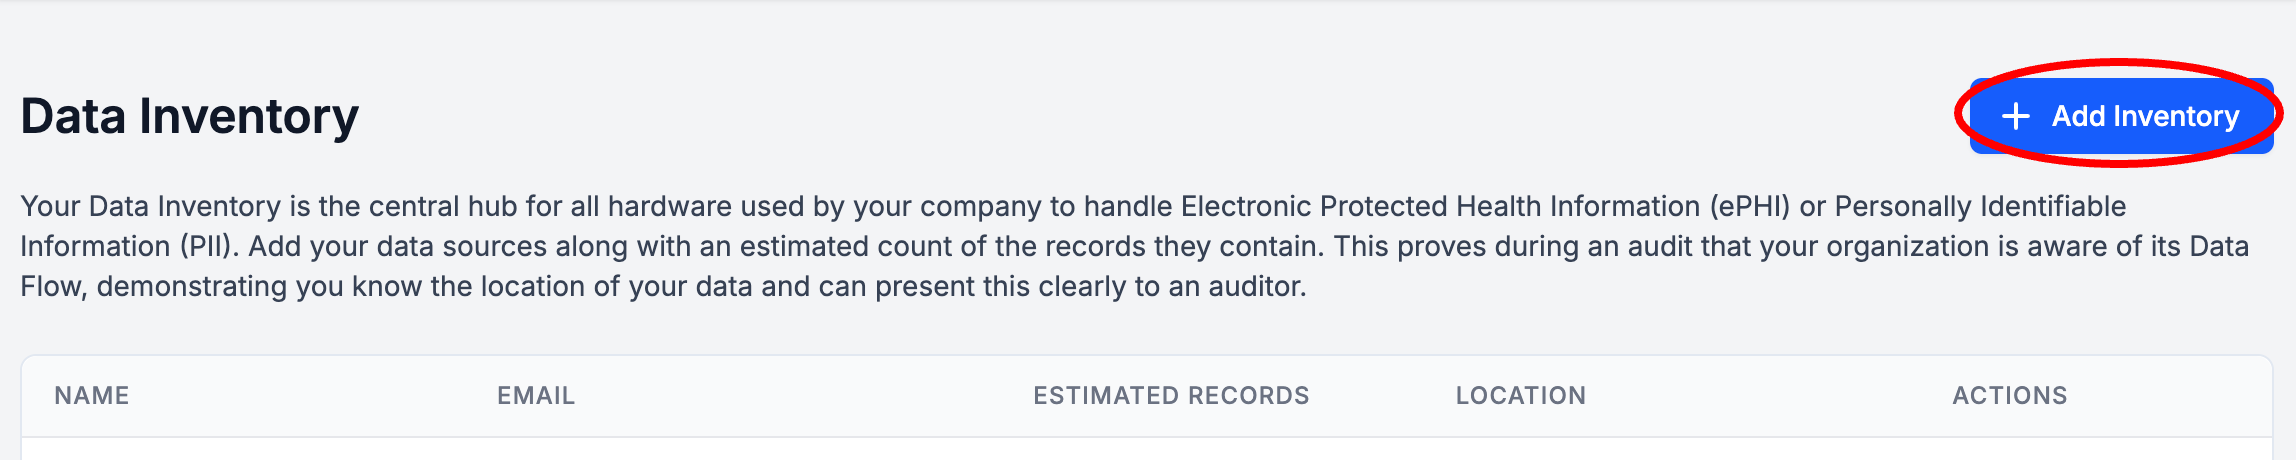
Select Add Inventory
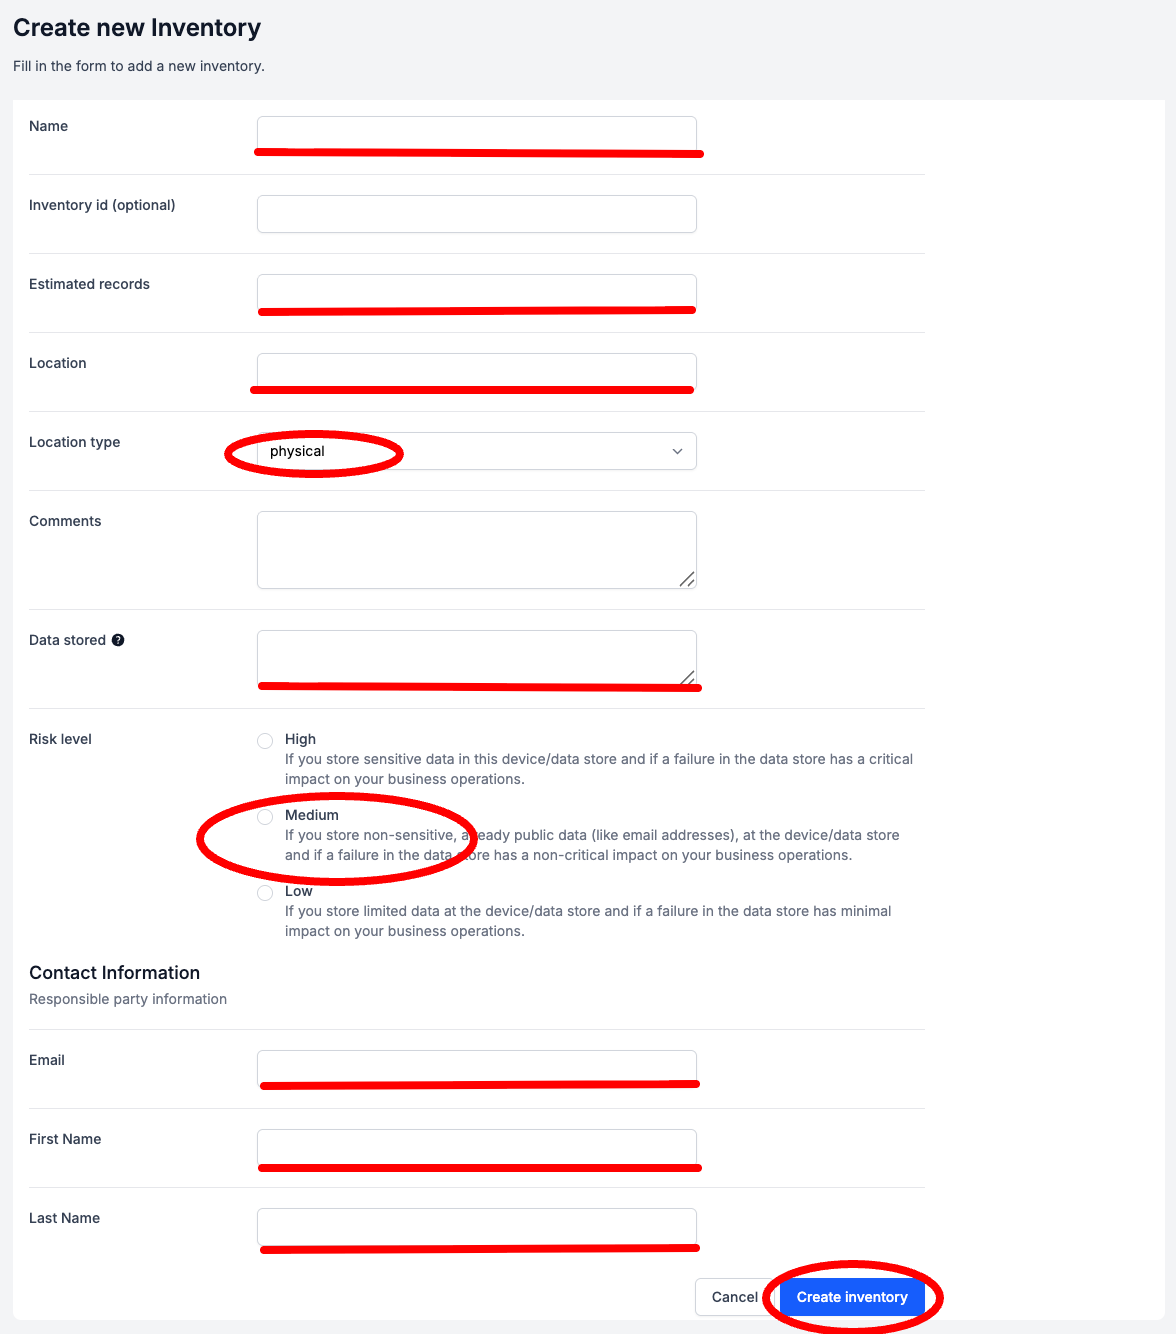
Enter Data Inventory Details (see breakdown below) > Select Create Inventory
The purpose of the Data Inventory section is to document what Inventory your organization has, and what it has access to. In the event of a data breach, this will help you quickly and specifically identify the depth and breadth of the issue to ensure that you respond appropriately.
- Name the Inventory (example: "Desktop Computer" or "Filing Cabinet")
- Optionally, add an Inventory ID
- Enter the Estimated Records count that this Inventory has access to (example: "1,000")
- Enter the Location of this inventory (example: "Office" or "Home")
- Select the Location Type
- Physical: this includes hard copies of patient records, medical charts, computers & laptops, hard drives & USB sticks, backup tapes, printers, scanners, fax machines, and medical equipment with internal storage
- Digital: locations where ePHI is stored, including on-premises servers, cloud storage services, databases, electronic Health Record (EHR) systems, billing softwares, and any other applications that process ePHI
- Optionally, add any comments you'd like
- Enter the Data Stored in a comma separated list (List of 18 PHI Identifiers)
- List out the specific PHI that this inventory has access to
- Select the Risk Level
- Enter the Contact Information for the person that is accountable for this Inventory. Enter their...
- First Name
- Last Name
Congratulations! You are one step closer to being HIPAA compliant. In your dashboard, your HIPAA score should have moved a little bit closer to 100%.
Next Steps
Step 3: Add BAs & Send BAAs